Showing posts with label Behind the Scenes. Show all posts

Friday, July 17, 2015

My Newest Student Film (F3) is Done!

SO EXCITED!!!!


This post is a few weeks late, but after over 380 days my third student film is finally done!  The film is called "At the Feet of the Union" and is about a young Confederate soldier in the Civil War who is struggling with self doubt.  I've blogged about it before, especially during the visual effects cycle, but now that we have been through the sound edit, the color grade, and all the formalities of picture lock in the film school it is finally finished.

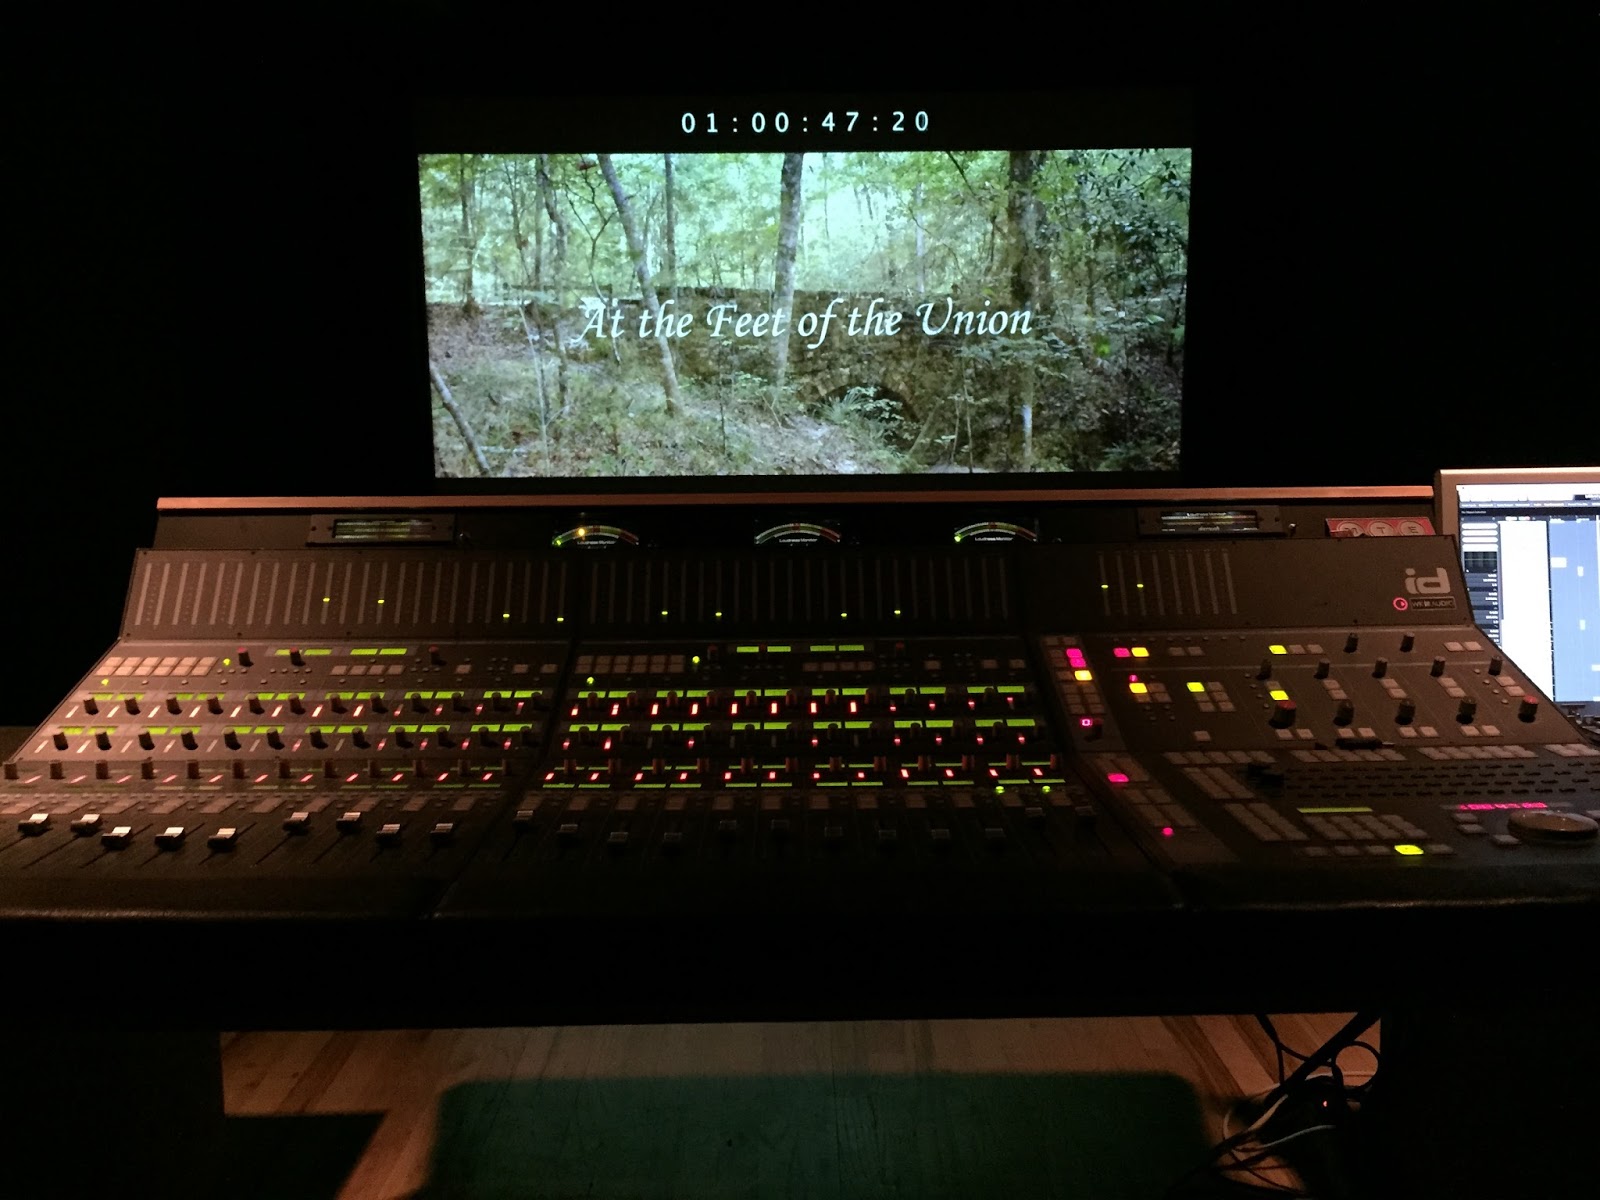
Mixing in the mix stage.
The sound edit was a one week process that started in a calibrated edit bay.  Most of my film was shot during a horrible rainstorm, so almost every single line of dialogue had to be replaced.  I recorded ADR several months ago in an isolation booth, so I already had a good head start on the dialogue edit: I didn't need to do much cutting and filling of white noise at all, which saved me a lot of time.  The school has a great sound library, which is where I pulled all of my backgrounds from.  For foley, I grabbed my friend Travis and spent a day in the school's foley booth.  The foley booth is a lot of fun.  There are multiple surfaces to walk on to create various footstep sounds and dozens of strange props and materials in there to make sounds.  We did all of the footsteps, clothes rustling, prop noises,  and body sounds in foley.  Finally there were a few hard effects I needed to add in, such as guns firing, and I grabbed those from the library again.  After the edit came the mix.  The mix was supervised by Chuck Allen, the post production supervisor at FSU.  Chuck has a career of experience in the music industry behind him and really facilitated the mixing process.  Sound editing is a creative process that is a lot of fun and has more to do with story than anything.  In my opinion, once you learn the basic tools your skill as a sound editor wholly depends on your creativity as a story teller and your understanding of soundscapes and how they can enhance a story.  Sound mixing on the other hand is a highly specialized and technical skill set.  Chuck took my edit and ran it through various auxiliary sends and returns and helped guide me through a strong mix in one of our mix stages at school.  He gave me creative control as far as volume levels and equalizers are concerned, but there is no way I could have done what he did to my film without him.  (We finished the film in a Dolby LTRT format, which I had never even heard of before.)  This experience really showed me the value in getting professionals to work on your film in the finishing department.


My DP, Victoria, working the control surface in Resolve.
Then we moved into color correction and grading.  This is one of my favorite parts of the post production cycle.  I just find it to be really fun and I have invested a lot of time into learning multiple color grading softwares.  This was the first time I got to grade a film in the full version of Da Vinci Resolve.  Previously I have only ever worked in the Lite version, but the full release gave us access to some very powerful noise reduction tools, which helped us out A LOT because at the time of shooting our F3s none of us had had any experience with the equipment package the school provided us.  I had a chemistry teacher in high school who would constantly tell us he believed the best way of learning was through exposure, and that is definitely the school's approach when it comes to gear.  They threw a Red Epic our way with some old 16mm lenses and basically said "have at it."  Each show we continued to learn more and more about the camera and the lighting gear we were using, but the noise reduction was a great tool to help us fix our mistakes.  For example, when it started pouring rain outside during our night exteriors, we lost the ability to light the scene because of the danger of water and electricity, so we pulled up a jeep and used its headlights in tandem with a practical fire on set.  We decided to go with a zoom lens so that we wouldn't have to change lenses in the rain.  A big problem with this was that we couldn't open up the T stop below a 3.5 or something like that, so we ended up with dark and noisy footage.  But if I had to go back and do it again I would make the same decision.  I believe that my DP and I made the best decision we could given the circumstances of the shoot, and the noise reduction really cleaned those night exteriors up.  It was great.  There's an odd little texture that comes from the NR sometimes, but it is WAY more tolerable and WAY less distracting than the noise, so it's just a tradeoff we had to make.

Technical processes aside, I want to talk about what working on a seven minute film for 380-some-odd days did to me creatively.  The production itself wasn't really 380 days: we took a huge break in the middle of that time to continue or regular classes, but that said the F3 was still very much on my mind during that time.  During the year of classes I took during the post cycle of my F3, I feel like I became a completely different filmmaker.  We had some really strong directing classes with Jason Maurer, co-director of the feature length animated film Delgo, and Antonio Mendez Esparza, writer/director of the award winning Spanish feature film Aqui y Alla (Here and There).  I also began an independent study with Jason (which I am still working on) during which we break down scenes from films and work on pre-visualization techniques.  Beyond that, I have really gotten to know our parallel class of students in the Production BFA program and have worked on several of their thesis films.  I feel that this year I had a lightbulb moment, where suddenly some things started to click.  The visual grammar of film, as Martin Scorcese calls it, is really starting to make sense to me and because of a particularly laborious film seminar I went through this year I believe I have much firmer grasp on the core principles of storytelling as a screenwriter.  So the bright side is that I feel like I am a better filmmaker than ever.  The downside is that these discoveries I have made and the things I have learned all taint the way I look at my F3, and when go back to work on sound or color or visual effects or whatever, I just can't stop looking at what I consider to be my mistakes.  Having to constantly go back and analyze and critique my seven minute film for an entire year was a surprisingly difficult experience.  It really made me question my own talent and abilities and really resulted in a lot of soul searching.  It's really hard to adopt a constructive mentality when you know that you won't be shooting your next short film for months and months to come.  In short, I never want to go through a process where I spend so long on something so short ever again.  It's destructive to morale, and doesn't create any opportunities to keep practicing and improving.  I hate to say it, but I don't like watching this film anymore.  I'm not exaggerating when I say that I believe I have watched it over 500 times.  Mistakes should encourage you to be better in your next endeavor, but in this case that encouragement disappeared quickly because there was no end in sight, and the mistakes became like weights looming over my head for a year.  That said, now we are DONE and I am more confident than ever in my ability to make a great new short film moving forward into thesis.  I'm an optimist, and even though the whole F3 process was arduous, I hands down believe that I learned way more from that process than if everything had gone smoothly and I was happy with my end product.  Not only have I learned to become a better filmmaker in terms of blocking, shot selection, cinematography, etc, but more importantly I have learned how to handle high stress situations, how to deal with malicious criticisms, how to adequately self-critique myself, and how to persevere and dig myself out of a creative rut.

Now... on to thesis!

Tuesday, April 21, 2015

Stay On Target... Stay On Target

F3 Visual Effects at FSU - Week 8


So here I am... eight weeks in, three days left... and I sit here at 11pm in the lab with my two remaining classmates, discussing the qualities of various kinds of pasta.  I've clearly switched off my targeting computer.

There are only three days left for us to complete visual effects on our third student films, woohoo!  It's a really exciting feeling and I can't wait to see how all of the films turn out.  Overall, this entire process has been an amazingly remunerative experience.  That said, I also am super ready to move on to the sound and color editing of my F3 so I can see it all come together and beyond stoked to move into thesis development this summer.  I love building Legos.  Love it.  But I'm at a point now where I'm just gluing the pieces together on this lego set and I'm ready to start a new one from scratch.

The F3 visual effects cycle, though filled to the top with fun and value, has began to feel like a road with no end.  But now I can see the light at the end of the tunnel - I just need to stay on target and be more focused than ever these next three days to get all of my work done quickly and to an exceptional level so that Christian's movie can be the best it can be.

Next week, I plan on posting a final review blog post where I will deep end on everything I went through and took out of this process.  Until then, I've got to go - Vader's come from behind, Han is nowhere in sight, and I've switched off my targeting computer.  Now, I just have to trust in the Force.

Wednesday, April 15, 2015

Looking Behind

F3 Visual Effects at FSU - Week 7


Thorin: Where did you go, if I may ask?
Gandalf: To look ahead.
Thorin: What brought you back?
Gandalf: Looking behind.
As I write these weekly posts, I have been making efforts to try as best I can to stick to content related to visual effects and my problem solving process when it comes to the new challenges that each week brings.  But this week I want to dig into my headspace a little, if for no other reason to clear my head by writing what's inside of it down.

As with anything in life, an important and critical skill set to have is to be able to stay focused and work clearly despite what difficulties you might be going through.  (Bringing this point up in a sentence is simply my way of justifying this blog post ;) )  I've been feeling a little discouraged and drained lately.  I'm not sure why and there's no clear emotion or cause for me point at.  But between some difficult situations involving other students, the monotony of the lab, some things going on back home, and the constant struggle of becoming a better artist I've just felt a little down lately.

One thing I think I've pinpointed is that in my more recent work, I am missing some of the raw joy of creativity that I used to feel.  I was just scrubbing through the first "real" short film I made in high school, called "PCRT211", and was missing how much fun I had making it.  It was just me and a camera, a couple friends for actors, and an iMac with Final Cut.  Similarly I was thinking back on weekends where I would spend literally hours upon hours on Video Copilot doing Andrew Kramer's tutorials and beginning to craft my own aesthetic.  It was a blast, and purely raw creative expression.

This school has conditioned me to question and question and question every creative decision I make.  And for the most part, I think that is a GREAT thing, because it makes my work BETTER.  But, I am also coming to realize that it's really important to look back and remember where I came from and why I'm doing this in the first place, and sometimes just putting pencil to paper (or mouse to photoshop document) and starting to freeform something - anything - is super important.  This might be one reason I love playing music.  I am not a serious aspiring music professional like I am a serious aspiring filmmaker, so when I sit down to jam on my guitar or piano or drums, I am not really thinking about anything - I'm just playing.  I don't ever consciously decide to hit the third, the fifth, or the seventh.  It just happens.  And if it sounds awesome it sounds awesome and if it doesn't it doesn't. And if it doesn't I keep playing and having fun until it does.

So I am going to be working hard over the next few weeks and definitely into the summer to create things for fun.  To remember why I want to be an artist and to find the great spiritual joy that comes deep inside from creating things I really enjoy.  There's a lot more to that than just lighting a shot to a visually pleasing aesthetic or simulating a dust blast competently or compositing a spaceship scene.

What's strange is that right now in this very moment I know more about filmmaking than I ever have in my entire life - and yet I'm trying to find the inner voice I had in high school when I made "PCRT211".  What's really ironic is that I believe the very fact that I recognize that is part of what makes me today a better filmmaker than I was then.

I'll finish off the post with some stills from "PCRT211", based on the short story "The Pedestrian" by Ray Bradbury.  Unfortunately, this film was taken offline by the Bradbury estate for copyright infringement.


Tuesday, April 7, 2015

Render Me This, Batman PART 2!

F3 Visual Effects at FSU - Week 6


I love my title pun, "Render Me This, Batman," but I quickly became upset that I used it last week because this week the title is SOOO much more fitting.  So, I just decided to use it again and stick a part 2 after it, just like Hollywood nowadays, right?

Last week I spent most of my time lighting and comping for the animated show "Yeti In Paradise, and that inevitably results in rendering.  My renders on that show took a while to complete, but weren't particularly difficult or time consuming to set up, especially considering I was only able to render on two computers.

This week I am working on the animated show "Live Tree Or Die", and our renders are substantially more complicated and taking much longer per frame.  So... I am currently rendering on nine computers.  Nine!

I understand that professionally I will be rendering on render farms that are set up, maintained, and run by a highly specialized and talented IT crew, but for now at FSU we have to manually set up each render - which all things considered really isn't that bad.  The fact we have more than one 32-core machines to render on alone is amazing.  We have a second computer lab at the end of the hall called the DA Suite, and I decided to take it over.  After faculty worked out a spreadsheet for all of the producers to use so that we could allocate computers for each film to render on, this week I was able to come away with nine.  Like I said, each computer's render had to be manually set up as opposed to the more standard system of shipping the scene off to a farm, and to set up the same render on nine machines meant piping the scene through the server and then copying the whole project file to nine separate machines.  Then I had to manually test the the file paths and set up frame ranges on each computer.  All together it took me about two hours running hectically back and forth between two labs to set this up.  What I ended up with was something that would make Lucious Fox proud:


A sea of computers all quietly chugging away in the DA Suite, each using 31 of the 32 available cores to process :,)
Tears of joy.

Now let's hope we didn't miss something in our test renders.....

Tuesday, March 17, 2015

Back to Business


F3 Visual Effects at FSU - Week 3

Technically week four, I'm back after a week off for a rocking Spring Break in LA.

For week 3, let's talk about Nuke.


I have been spending almost 8 hours a day in Nuke for three straight weeks now.  My total time spent in Nuke comes out to about 27 or 28 hours a week, which means that since this cycle has started I've spent close to 84 hours or so in the program.  Couple that with the 10 hours or so a week I was spending in the program over the 8 weeks before VFX started for classwork/homework and the experience I brought in from our intro course last semester and it starts to add up to a lot of hours in the program in a relatively short amount of time.  I have really learned a lot about the software and am immensely happy with my progress in it.

This past week I have spent the majority of my time working on crowd replication and 3D camera projection.  These are big steps for me.  The crowd replication shots pushed my knowledge of keying and forced me to start looking for creative solutions.  Here are three things I started doing to my keys that made them stronger keys that looked like they belong:

1.  Edge Correction
One problem I was facing was green tinted edges around the edges of my comp.  Getting rid of them by eroding in sometimes wouldn't cut it.  It took me a while to sort out how to pull this off, but I eventually figured out that I could make a separate pipe off the keylight node, erode in the key to get rid of the edge in the alpha, then invert that alpha so that only the edge was present.  Once I had isolated that edge, I could use it as a mask on a color correct node and get rid of the green by grading it out.

2.  Core Mattes
One problem I was running into was the key pulling data out of the green channel across the entire plate, not just the screen.  This wasn't always an issue; it only became an issue on some of the noisier footage that was shot slightly underexposed.  To solve this problem I had to matte an alpha channel into the plate by using a shuffle node, then feed that shuffle down a separate pipe and merge it back into the main pipe after the key was pulled.  Then I just had to make a rough garbage matte in a roto node, animate it quickly to follow the action, and apply it as a mask to the new merge node.  I don't think this is the best or most accurate way to make a core matte considering it requires me to animate some roto mattes.  However, in this particular shot all of the subjects in my plates were standing almost completely still so this method was extremely fast and the results were great, and I do believe the best methods are the ones that provide the best results the fastest on a shot by shot basis.

3.  Keymixing
The ability to quickly and easily key mix in Nuke is one thing that makes Nuke a superior keying solution to After Effects.  In After Effects, it is possible to "keymix," but it requires either duplicating your plate as many times as your keymix will require and then masking and keying each plate separately or precomposing your composition after each key.  Both equally obnoxious and frustrating.  In Nuke, it's as simple as pulling another key and then plugging both keys into the keymix node and applying a fast garbage matte roto mask.  It's very fast and is just as easy to mix in the twelfth key as it is the second, as opposed to After Effects which gets harder and harder with each mixed key.  Keymixing was a fast and efficient way for me to isolate color variations across the green screen and take care of them.

In addition to these three keying techniques I used to help sell my crowd replication shot, I also added  in a 3D camera move in an effort to help glue the shot together and draw focus to the center of the frame.  In order to pull this off I had to utilize the technique of 3D projection mapping.  In After Effects I have created 3D moves by separating assets onto planes and pushing them back in z space dozens of times, but I had never attempted projection mapping before.  In AE, projection mapping is an overly convoluted and difficult process that I rarely had a need to even attempt, and when it could have come in handy I just chose to look for an alternative solution.  In hindsight, I really should have put the time into learning how to projection map in AE, but in Nuke it was an amazingly logical and fairly straightforward process.  I roughly modeled the scene out in 3D space using planes that I oriented to match the space (ground plane, house, people, etc) and then projected my comp onto the 3D scene using the Project3D node in Nuke.  The more accurate your 3d geometry, the more correctly the projection fits and the more accurate your camera move becomes.  But this scene was so simple just using rough planar geometry was enough to get by.  Again, the fastest way to achieve the result is the best.

I have learned a lot about Nuke over the past few weeks by being forced to think through all of these issues and come up with creative solutions.  I am really excited to see where I go from here with Nuke, and if I continue to learn and progress at this current rate I truly believe that by the time thesis visual effects roll around I will be at the level of total photo real compositing.  I just have to work on my 3D rendering first :)

Tuesday, March 3, 2015

Time to Go Mobile - Putting the Pedal to Floor to Deliver Market Fresh VFX in 8 Minutes

F3 Visual Effects at FSU - Week 2


We're now over a week into visual effects production on our third student films at FSU and progress is really cranking.  I've only been working on my own film so far, and that has created an interesting feeling and approach to the work I have been doing.  I wrote last week about the schedule that I am trying hard to stick steadfast to, and now that I've experienced a full rotation of that schedule one side effect I hadn't really intended is that it almost industrializes the experience of creating art.  As opposed to writing or directing, with visual effects I really can just come in to school, put in an eight hour shift, and go home.  Writing, directing, and other steps towards the front end of the pipeline seem to occur more organically to me.  Ideas form slowly, taking shape over time with excitement and coming together to culminate in the amazing experience that is the creative process.  This is where working as the primary artist on my own show in this workplace of an environment starts to create the interesting feeling I mentioned above: because this film is MY idea and MY passion, I want to scrutinize every pixel of every frame and spend an eternity on each shot making it absolute perfection, even if that level of perfection is beyond my current skill set.  It is very hard for me to move on to a new shot whenever I "finish" one, because to be honest I'm not satisfied with any of my shots.

Let's flip the tables to when I'm not working on my own show anymore.  Presumably, I will be working towards another artists vision, obviously putting my creative fingerprints on their work but still reaching towards something that inherently isn't mine.  Suddenly, I might not be a huge fan of a part of my work (for aesthetic reasons) but it fits the directors vision and he or she loves it.  When this state is achieved, I feel like it will be much easier to move confidently from shot to shot knowing that I have completed my task and satisfied the director.  I believe that reaching a level of personal satisfaction will be easier if I am meeting the expectations that others place on me, because I won't have the burden of creating my own "perfect aesthetic."

This isn't to say I won't put forth 100% effort into other peoples' shows - on the contrary I plan on giving every show I work on everything I have to give.  I just theorize that it will be easier to be emotionally satisfied with my work when I'm working towards reaching someone else's design, because I always find flaws in my own work.  Ultimately I'll just have to wait and see if this reins true.  So far in my "career" as an artist I have only worked as a visual effects artist on two films that weren't my own, and I was only on each film for one week.  But it seemed true during those two weeks, so we'll just have to see if it stays true for the five weeks I work on other shows during this VFX cycle.

I keep telling myself that never being satisfied with my own work is probably a good thing, pushing me to work harder and get better, but ultimately it becomes a discouraging emotion and that's what I'm pushing through right now - finding the strength to stay on schedule by leaving one shot behind and moving on to the next.  Speed and structure are important, and without this kind of schedule it might become really easy for shots to get pushed back and pushed back and for things to missed and for deadlines to never be met until eventually the film never gets finished.  

Additionally, Ive found that this week has been a little difficult in the lab for personal reasons.  Artists will quarrel with other artists and sometimes feelings get hurt on both ends of the spectrum.  I believe it's crucially important for me to take those kinds of experience personally, examine them, grow from, become a better artist from them, and work through them, continuing to create quality work in a professional environment.  I can't let disputes bring me down, I have to harness what they can give me and find ways to improve from what they bring.

To sum up, I've come out of this week feeling a little discouraged with my own work, but I'm trying to use that experience to propel me to make better work than ever.  I'm also working at a pace that is completely new to me.  In fact, it is this speed that inspired the title for this weeks post.  It came from a fantastic YouTube video I discovered a couple of years ago after The Dark Knight Rises came out.  You can watch it here if you have the chance.  I encourage it, I found it quite enjoyable.

I'll finish the post by showing some of the shots (at various levels of completion and also highly compressed) I have been working on thus far.  I shot in Florida, but am striving to make the show feel like Tennessee.  Hope you enjoy!

Thomas and General MacArthur overlook the Smoky Mountains in Tennessee at Sunset.

The same shot from a slightly different angle.

Close up on Thomas at Sunset, the Smoky Mountains a haze in the distance.


Tuesday, February 24, 2015

Out of the Frying Pan, Into the Fire - Welcome to the Production Pit

F3 Visual Effects at FSU - Week 1


First off, I'd like to say that this weeks title was completely stolen from my friend Collin, who titled his blog post the same thing.  But then again, the title is originally from Chapter 6 of JRR Tolkien's The Hobbit, so I'm just stealing what Collin stole first.  It's my way of a not-so-silent protest.

This week we started visual effects on out F3s, our third student films at FSU.  For the zero people out there that actually keep up with my blog and are wondering about what happened to the F2, maybe someday I did briefly gloss over it it posts here and here.  I probably won't ever go into a detailed BTS of it like I did with the F1, but going behind the scenes of the F1 was more of a reflective exercise for me in my spare time and I've kind of changed how I do that now.  Now I keep a small journal and sometimes I'll go outside and noodle some thoughts in it or something.  Our workload at school has also changed dramatically: new city, new professors, new curriculum - essentially a new life.  I think it's important to change how you do things as your world around you is changing.  I had an English teacher in eighth grade who made sure he made at least one big change in his life every couple of years.  For example, one day he decided to start brushing his teeth left handed and he's been doing it ever since.  Likewise, a couple years later he decided to start tying his shoes backwards.  Never went back.  I've never tried doing something like that on the minor scale that he did, but I think that the concept would apply in the macro to our lives as a whole.  But what the heck do I know, right?

For the F3 visual effects cycle, the faculty are giving us eight weeks.  I got scheduled as an artist on four films, including my own.  So this comes out to roughly two weeks per film, but that's not how I got scheduled.  I'm spending three weeks each on two live actions films as a matte painter and compositor and one week each on two animated films as a lighting artist.  I couldn't be more excited.

For the entirety of film school so far everything I have done has been on a Mac, but for this cycle we were moved to a lab colloquially called "The Production Pit" - all PC's.  The adjustment has taken a little time to get used to - mainly I keep hitting alt instead of control because that's where the command key is on a Mac - but the machines are much faster and more powerful and I haven't run into any issues.  We also have dual 35" monitors and HUGE tablets.  Sometimes I have to pinch myself.

We've only been in the VFX process now for two days but already I have been incredibly productive and am super excited about my results.  This year I am tackling all my composite shots in Nuke instead of After Effects, and while I will always love After Effects - and still firmly believe it is a better program for 2D motion content creation - Nuke is an absolute dream.  I am able to achieve better results faster, and that's something that just doesn't happen every day.  So far I have completed one matte painting asset and almost completed one shot composition, and I believe that they are on the photo-real level which makes me unbelievably satisfied.  I have been working towards the goal of photo-real set extension for years now and this shot might be the first time I have ever accomplished that.  Years of practice from middle school up is really starting to pay off... at least I think it is.

One reason I believe I have been able to complete a matte painting asset and photo-real composite in just two days is because of an incredibly efficient time management workflow really stressed on me by my professors Jason and Ken.  They have pushed taking a 5-10 minute break every couple of hours, not working over time, timing yourself while you work, and meticulously logging all of my hours.  Additionally, my professor Jonathan helped all of our shows set up incredibly detailed shot breakdowns using a management solution called Shotgun.  This workflow has kept me laser focused in the lab.  I built a playlist in the glorious Spotify of some of my favorite music and some new music, made an account at www.toggl.com to start timing myself while I work, put my headphones on and have been powering through tons of work at a high speed and still had time to relax and play basketball in the afternoons.  This new schedule really excites me because if this pace continues, not only will I be getting more work done but I will also have more time to myself to get back in physical and spiritual shape.  In the F2 VFX cycle, I worked close to 16 hours a day for two weeks straight, and by the end I looked horrible, felt horrible, ate horribly, and each day dragged on and I got less and less work done.  If I really can get much more work done in this much more reasonable F3 schedule, I will have discovered possibly the greatest thing in the history of mankind...

I'm really looking forward to continuing through the visual effects cycle and becoming a better artist, while having more time to myself to develop thesis and other short film ideas.  I've also freed up a lot more time to play basketball, which is great especially considering I'm out of shape right now and my intramural team needs me more than ever as we move into the playoffs.  Tonight we played our first playoff game and won by 1 point with 2 seconds left.  It was awesome.  Hopefully and can keep winning and extend our season by another five weeks - that championship t-shirt really would look great hanging up in my closet.

Saturday, March 29, 2014

The Making of "Starfishing" - A Behind the Scenes Blog: Part 3

Well, here at FSU we just wrapped production on our second student films, so I think it is high time I finish writing about my first student film.  This blog will focus on the post-production process for my F1.  While I would love for people to learn something form this blog, I'm not treating it as a tutorial so I won't go too deep into anything technical that I did.  But if you have any questions, as always feel free to ask! :)

Post-Production


With Production wrapped, and one quick weekend to wind down, it was time to enter the lab.  The lab can be interesting.  My school has two computer labs: a mac lab and a PC lab.  Both labs are connected to the same server and have all the same software installed, but the PC's are stronger machines.  Unfortunately with that being the case, the upperclassmen claimed the PC lab as their own, not letting us in without some form of right of passage.  But it's really okay, the macs are great machines too and I personally likes OSX better than Windows anyway.  The lab can be a fun place... Lock 15 film students in a room full of computers for about 50 hours and you will get some interesting results.  I'll leave it at that.  The lab was where I went through the first stage of post production: the edit.

The Edit


For "Starfishing", I shot around 80 minutes of footage.  All of this had to be taken off the camera card and brought onto the computers.  For this, I used Adobe Prelude.  Prelude can seem like a worthless program sometimes if you have ever used it before, and honestly I didn't even take advantage of it really when editing my film.  But it did serve one immensely useful purpose.  The Canon XF305 initializes the CF cards in such a way that it stores each clip in a separate folder.  If you were to simply drag on drop the clips off the CF card straight into your editor, you would have gotten a hundred bins inside your project window and you would have had to open each one individually to find all your footage.  Using Prelude bypassed this problem.  Prelude pulled all the clips out of the folders for me and allowed me to name each clip before shipping them off to my editor, Adobe Premiere.

Once in Premiere I started editing right away.  The first cut of my film went really well, but I did face a small internal battle.  I knew we were going to have to screen our first cut to faculty, so while I really wanted to smooth out all of my audio cuts, I was afraid it would be a huge waste of time because I was just going to have to recut a lot of it anyway.  But I did it anyway and made my audio sound nice and smooth... and sure enough, after getting some GREAT feedback from faculty, smoothing out the audio proved to be totally worthless as I had to redo it all again anyway.  I went through five cuts of the film before I was satisfied with what I had.  In the first cut, my professor rightly pointed out that I rode on way too many close ups.  Instead of cutting to close ups to make an emotional impact, they served as my primary source of dialogue coverage.  So in my second cut I worked really hard to fix that, but as a result I think I had way too many wide shots and not nearly enough close ups.  In my third cut, I think I finally found a nice balance.  Then came the fourth and fifth cuts, by far the hardest.  Getting everything down on my timeline was easy, but by the time I reached my fourth and fifth cuts all that was left to do was fix some minor issues or improve small areas I wasn't quite happy with.  Sometimes the difference between a bad cut and a great cut can be just a few frames, and that's what the fourth and fifth cuts came down to: fixing the tiniest issues in an attempt to make a huge impact.  I believe in my fifth cut I ended up only making one chance from my fourth cut, but figuring out that one change took just as long as laying down my entire first cut did!  The devil's in the details, that's for sure.  Once I finessed the edit, I was able to move on to the visual effects.

The Visual Effects


The visual effects in this film were pretty small, and to pull them off I used Adobe After Effects and Adobe Photoshop.  The only VFX shots in the film are the shots involving Hope's power cell.  To pull off the effect, I made a battery graphic in Photoshop and then motion tracked it onto the prop in After Effects using Corner Pin tracking.  Then I just changed the blend mode, slapped some glow on there, and did any necessary rotoscoping (altering the shot frame by frame) work needed to make sure it passed beneath Hope's shirt.  Finally I had to mess with the opacity keyframes in the shot where the battery flickers off.  It was all around a pretty simple shot and I'm super happy with how it turned out.

The Color Grade


After my cut with visual effects was complete, I was able to move on to possibly my favorite part of the post production process: color.  I graded my film in Da Vinci Resolve using the schools Tangent Wave board, and let me say, I was BLOWN AWAY by the awesomeness of this program and this board.  It has spoiled me and I hate color grading on anything else ever since.  To grade the film, I made a new timeline in Premiere and flattened it all down to one video layer, then I deleted the sound and exported the sequence as an EDL.  In Da Vinci, I imported all of my source media from the server and then imported the EDL and reconnected all the edits in the conform window (now the "edit" window in Resolve 10).  The grade itself was really two steps: first I went through and matched the color of all the shots.  This was essential because as we shot outside, the light from the sun was always changing due to cloud cover and time of day.  Matching all the shots was essential.  For this task I relied mostly on the scopes, matching each clip to the clip from that scene that I liked the most. After I completed the color correction, I moved onto the creative part of the process which is the grade.  First, I added a lot of emphasis on my characters faces by tracking some power windows over their heads and raising the levels.  Second I adjusted the overall color balance of the image. Then I adjusted all of the contrast to something I was happy with.  For a lot of the shots, to accomplish the right contrast I used a technique designed to emulate a bleach bypass by creating a layer node, desaturating the top layer, and then chaining the blend mode to overlay.  This effect can sometimes look amazing, and in a lot of my shots it really did.  Finally I went through and sharpened a lot of shots, especially around the eyes.  Adding a sharpening power window around a characters eyes really makes them pop, a trick I learned from colorist David Lindberg.  Check out his website, http://lindbergdavid.com for some great inspiration.  Once I completed all of these steps (which took about two entire days) I exported my footage as uncompressed 4:2:2 8-bit (what the Canon XF305 shoots in) and brought it back into Premiere.  Now it was time to move onto audio.

The Sound Mix


For my sound mix I used Adobe Audition.  I like to think of sound as one of those areas that I think I know a lot about but I really don't.  Every time I think I learn how to do something really cool, I listen to some reference of professional mixes and realize how crappy mine really is.  Reference is so important: when you are sitting in a sound room by yourself listening to nothing but your own mix for 6 straight hours, you start making some decisions that you think are great.  Then you leave for 2 hours to grab some lunch, come back, give it a listen and want to slap yourself in the face.  My biggest piece of advice for sound mixing: unless you are a professional, educated mixer, listen to professional mixes for reference and try to match them.  It will help you a ton, and this is something I WISH I had done during "Starfishing."  Instead I tried to mix it myself, which proved to be a huge challenge.  Nonetheless, after 4 or 5 days in the mixing room banging my head on the desk wondering why nothing seemed to work, I think I came out with something pretty decent compared to what I started with.  The natural sound of the alleyway was horrible, and I did a fairly good job I think of pulling a good amount of that sound out of the shots.  I pulled enough anyway to make the dialogue at least understandable, which I was satisfied with after 4 days of going nowhere.  I ended up using a notch filter to pull out background sound.  The notch filter identifies specific frequencies and eliminates them with a little bit of falloff on the surrounding frequencies.  It worked wonders in my alleyway in ways that noise reduction could never dream, and when paired with track EQ's and the sound effects, I think it turned out alright.  Something that was really fun about the sound mix though was my foley sound effects.  Our school has a foley booth set up with all kinds of interesting things to make interesting sounds with.  I set up a couple of microphones and recorded some great footsteps, rustling clothes, impacts, breathing, and other various sound effects to use in the film.  This was actually a lot of fun, and I could see myself hanging around the foley guys on some film someday just to have fun.  I also downloaded a lot of sound effects from Creative Commons websites, which were promptly credited in my film.  It all came together to make a decent overall mix, although the sheer amount of on set noise just made it difficult to hear some of the lines, no matter what I tried in post.  So this is the part of the blog where I obligatorily state to all budding filmmakers: get good audio on set.  You won't regret it.  I wish we had been permitted the use of lavalieres on the F1 set, and also I wish our school had a sound blimp to put over our shotgun microphones.  I think that would have made a huge difference.  Nonetheless, I think what I ended up with was pretty good, and I'm proud of all the work I put into the mix :)

•          •          •

Well, today is March 29, 2014, two whole days after taco bell breakfast has been released and I still haven't even tried it.  I think I'm gonna head that way now and try one of those AM crunch wraps before heading back to the lab to do everything I just talked about again on my second student film.  Oh the life of a film student - it really is awesome :)

Saturday, March 8, 2014

The Making of "Starfishing" - A Behind the Scenes Blog: Part 2

"Go make your movie."
~ J.J. Abrams

I love this quote.  It is literally four extremely simple words stuck together into an extremely simple sentence, but it encompasses so much more than the simplicity could ever imply.  Filmmaking is all about passion, and if you don't have it, it will show.  In the context of the interview, JJ was asked, "Do you have any advice for young filmmakers?" to which he answered, almost dumbfounded by the question as if the answer was obvious, "Go make your movie!"  He then began rambling on about how easy it is for the kids of my generation to pick up a video camera and start shooting movies, whenever they possibly can, and how that will build the passion that you need to succeed.  This concept was in the back of my mind throughout the entire production cycle of "Starfishing"; this wasn't a student film that I was making for a grade, this was my movie that I was making because I wanted to.  Treating it that way is the first step to becoming immensely passionate about your project, and it's that passion that will drive you (as it drove me) to stay up all night in the lab, to put in the extra hours in the color suite, to do your own foley sound recording, to properly mix and master your soundtrack, to edit and re-edit your film five, six, seven times; having passion is the first step in the production cycle, everything else is all just sticking to your guns and following through.

PRODUCTION


The policy at FSU for F1 production is that you get one 12 hour day to shoot with a one hour break at the halfway point for lunch, totaling to 13 hours.  The faculty are very strict on the schedule, meaning that not only are you done shooting by the 13th hour, but that you are completely packed up and disappeared by the 13th hour, as if you were never there in the first place.  This obviously creates a time crunch, but once preproduction is complete, the actual physical production of the film is a relatively straight-forward process.  Assuming you did your homework in preproduction, what you do on set as a director should feel completely natural and, in theory, everything will run smoothly.  This isn't to say there aren't any snags - on the contrary, you will always, ALWAYS, run into problems on set.  In all the sets I've been on in film school, something has always gone wrong.  During the filming of "Starfishing", one restaurant bordering the alleyway had their septic tank pumped, so for about two hours we couldn't use the alley; another restaurant was having their grand opening, but their kitchen wasn't finished yet so all day chefs and construction crew were coming in and out right by our set and making A LOT of noise; we filmed the third scene of the film - when Hope is running around like crazy - first, but then it started pouring rain, so we filmed the whole scene again in the rain; our extension chords weren't long enough to reach our set during the night shoot, so we had to move the whole set down the alley to a backup location that wasn't ideal (but ended up working really nicely); and finally, filming in a city by a crowded city street meant noise, and A LOT of it - a lot of really great takes were ruined by car horns or street noise or passerby's.  All this goes to show that when filming a film, expect that nothing will go right.  I mean this honestly: if you do that, you will remain mentally stable when nothing does go right and become mentally awesome when things do go right.

As I mentioned above, the physical production is a relatively straight forward process.  So what I will do is talk a little bit about some of the directorial decisions I made during production, but mostly just show a lot of photos from the production.  The photos are fun and they capture what the essence of the production was like much more than my descriptions can.

WORKING WITH ACTORS

The hardest part for me during production was remembering that the performances of my actors are worth a lot more than the frame they are staged in.  That's why a black and white movie from the 1930s can still hold merit today, even without the amazing technology we now have.  This was probably the single biggest thing that I learned during my first semester at film school, and it was very difficult for me to hand off the camera to my crew and then walk away and work with my actors.  Trusting that they were going to set up the scene the way I pictured it in my head was difficult to do, but the detailed storyboards and floor plans from preproduction made it easy for them and the results they got were incredible.  While working with my actors, I would always walk away from the set and then just let them rehearse the scene.  I would give my input and then they would go again.  From my classes, I was encouraged to never read a line to an actor.  "We want inspiration, not imitation," my professor said.  This was difficult for me - it was a new way of working.  But I trusted my professors and the result was outstanding.  By giving my actors motivations, stakes, and objectives - as opposed to where I desired various inflections and pauses and changes in volume - I was truly able to mold and shape their performances to help them jump off the page.  Once we did get back to set to start shooting, I would do the same thing: after each take, a little praise, a little critique, and then right back at it.  And on the note of praise, I can't stress how important that is.  No actor likes to sit there and be critiqued all day.  Besides, odds are your actor is a much better actor than you!  Praise your talent for every good thing they give you.  It really improves the morale of the set and helps their performances reach the next level.

Working with actors away from the set was an important part of the process.

Ryan, truly focussed.  Nikki... uh.... 
Big shout out to Nikki for being a trooper through the freezing, wet day. 
Ryan waiting for us to finish building the set.

Performing a scene.

Working with Nikki.

It really was a wet day.  The umbrellas were super helpful.

"Ryan you do what I tell you or else!"

CHOOSING THE FRAME

Despite the fact that I trusted my crew to set the initial frame while I worked with my actors, the frame was still very important to me.  The frame to me is much more than the relative positioning of actors and the camera on set though.  To me, the frame involves all the technical aspects as well, ensuring that I can have the best possible image quality and color to support the feel of my film.  Something I brought with me to set from my background in shooting DSLR filmography was the importance of proper exposure.  We shot our F1's on the Canon XF305, which is a broadcast quality camcorder.  From my understanding, it is aimed primarily at news crews.  The XF305 would be absolutely fantastic for documentary filmmaking, but can really be hard to work with on a film set, especially when coming from a DSLR background.  Some key functions we are used to like ISO, Picture Style, Color Space, and interchangeable lenses are entirely gone.  Others like aperture, shutter speed, and focal length are present but entirely different.  However, a bright side to the XF305 is it's picture quality.  Unlike DSLR's which shoot in the messy h.264 codec, the XF305 shoots its own MXF format, which is a wrapper for some from of MPEG-2.  I'm not entirely sure how it works but the bottom line is that the clarity is AMAZING.  You don't get the pixel dancing on the XF305 that we might be used to on the Canon EOS DSLR series, including the 5D Mark II at times.  But the downside to this is how slow the lens is on the XF305.  If you turn off the lights you just aren't going to see anything.  Period.  My solution to this was to shoot my film at a completely neutral exposure, drop the camera gain to the lowest possible setting (even lower than the default "Low" setting), and to use tons and tons of on set lighting.  This kept my actors bright even in the even of having to underexpose a shot to keep detail, kept all noise out of the shot, and kept my colors as neutral as possible for leeway in post.

Another decision I made about my frame was to shoot in a 2.35 widescreen format.  The downside to letter boxing 1080p video to appear to be shot in anamorphic widescreen is the loss of data: by doing this I effectively cancel out about 33% of my frame.  But I chose the widescreen because I believe that widescreen can greatly add to the feeling of isolation and desperation when used properly, which I believe really paid off in my third scene.  I also believe it lends itself to tension more than a full frame.  When you look at a square and a rectangle side by side, which appears to have more action?  I believe that narrower frames add an inherent dynamic to the composition that seems to imply complexity mores than a full frame.  Finally, I believed that by cropping a third of my image out of the frame, I would help to hide the shortcomings of the XF305 and thus help keep my audience interested in the story as opposed to being thrown off by poor quality video.  Shooting on the XF305 meant overexposing a lot of skies to keep my actors bright.  Cutting out those skies threw my audience's focus completely onto the characters - which is what is important - on top of placing them in a medium they are more accustomed to seeing (most films are shot widescreen), all adding to what I hope is an increased immersion in the film.

Finally came the actual composition of the frame, which is the most important part of all.  My storyboards were very helpful during this part of production, and for the most part my director of photography, Victoria, nailed the framing every time.  I simply handed her my board, showed her where I wanted the frame on set, walked away to work with my actors, and when I came back it was done.  This also applied to lighting.  I would tell Victoria what kind of look and feel I wanted and when I came back the lighting would be almost spot on.  As for lighting though, I had a very specific plan in mind.  I really wanted to stress the depth of the alley, so I threw really cool blues into the background while keeping he foreground warm.  I also really wanted to showcase the grittiness of the world while staying true to reality.  This was difficult, because in real life alleyways have soft, overhead, tungsten lighting but I wanted a really hard lighting feel.  It was a difficult balance between finding my light source and applying just the right amount of diffusion, but my gaffer Grace Colley did a great job.  Obviously, there was a lot of tweaking throughout the day, in both the framing and the lighting.  No one can exactly match my vision without being in my head, it's not philosophically (or physically) possible.  My general on set workflow, therefore, went a little something like this: at the start of a new setup I would show Victoria the storyboard and light plan and explain to her what I wanted.  Then I would walk off set and work with my actors while Victoria would work with the crew to set up the set how I wanted it.  When it was done, my assistant director Justin would come and get me and the actors and bring us to the newly built set.  I would then place my actors where they needed to be and do some rough blocking, then tweak the camera and lights until they were perfect and start rolling.  At the end of a setup we would tear it down and start all over again.

My Director of Photography, Victoria Cragg

Boom Operator Elangie Pereda works with Victoria.

Checking the frame.

Elangie booms a wide shot from far away.

"Who wrapped this cable grrr..."

Ta Da!

A wide shot of the set

Victoria filming a shot.

Cinema?  I direct dat.

Grizzly.  Et Syder y Razza.

Getting ready to roll!

You can see the 2.35 widescreen bars farming Ryan.

Cool DIY dolly rig.

Victoria goes hard.

The start of the night shoot.

Directing at night.

Deeply thinking... I'm sure it's about dinner.

Shooting into a light always looks cool.

•         •         •

I hope you guys enjoyed this post and that it didn't get too dry with some of the technical stuff there in the middle.  I know in my last post I said I would touch on post-production in this post also, but I think this post just reached a point where it got too long.  I never want my posts to dry out by the end, and if I am reaching that point please let me know in the comments!  Finally, I just want to make one remark about all of the pictures: one crew member who is missing from all of my pictures is my gaffer, Grace Colley, and that's because she's the one taking the pictures!  So a huge thanks to Grace for taking all these awesome pictures for me, I really do love all of them!  On that note, keep checking in for my next post on the post-production process and then what will be my fourth and final post in this BTS Blog which will touch more on the personal side (the -losophy) of the film for me.  Thanks again for reading and showing your support :)